


Using GenAI to quickly create webapps for use with Zebra RFID readers
Using GenAI to quickly create webapps for use with Zebra RFID readers
Overview
This blog demonstrates the use of the Enterprise Browser RFID API ( https://techdocs.zebra.com/enterprise-browser/latest/api/re2x/rfid/ ) to easily RFID-enable any web application . It also shows how a GenAI tool such as ChatGPT can be used to quickly and easily create the basis of an application before manually adding the RFID API calls. This approach is recommended for quickly creating demos and proof of concepts rather than production applications. In this blog we will use the example of a simple retail checkout application whereby each RFID tag corresponds to a product in a store and reading the tag (or associated barcode) will add that product to a basket and increment the total price .
Method – using ChatGPT
- Download and install Enterprise Browser on a Zebra device which is supported by the RFID 40/90/8500. This process can be automated by reading the appropriate StageNow barcode below on a device with a pre-configured internet connection:
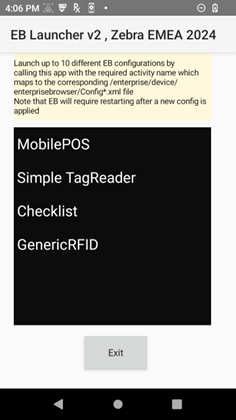
2. After installing this profile, Enterprise Browser will be ready to use for RFID apps and you will have a number of pre-build demos available which can be selected via the supplied EB Launcher app. Note that these demos are preconfigured for an eConnex connection between the host Zebra device and the RFD40/90.
3. In order to create a new application via ChatGPT, logon to https://chatgpt.com/ and then enter the description of the required app which should be as concise as possible in order to generate a working webapp. For this demo , the description we will use is as follows:
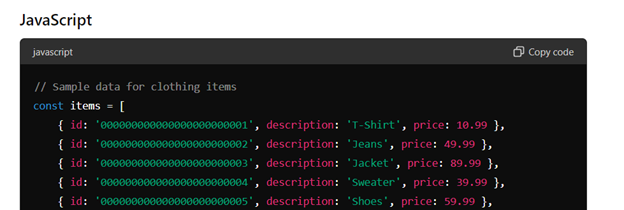
Generate a list of 10 clothing items commonly found in a retail store . Each item consists of 24 digit number (which should increment from a starting value of 1), a text description and a price which should be defined in JSON. Make a single page Javascript and HTML app to display a text input field to enter a 24 digit max number. Each time a number is entered via carriage return , call a function to check if it matches an item on the list – if so that item's description is displayed as a receipt list together with the price and an initial quantity of 1. If the item is already in the receipt list, increment the quantity for that item and update the total price . Also display the total price of all the items on the receipt list . Add a button to clear the receipt list and total price i.e. reset to initial state. Add a save button to allow the current receipt list to be converted to a blob and saved locally as a csv file together with the total price. Add a print button to print the current receipt.
4. Submit the description and ChatGPT will start to generate the required HTML+Javascript
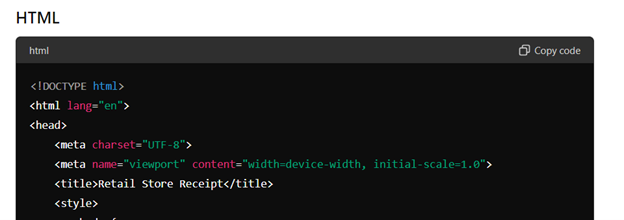
5. After generation is complete , you will see a ‘copy code’ icon at the top of each panel. Use this to copy the HTML and/or Javascript code to the clipboard. If the Javascript is generated as a separate JS include file as per the example below , replace the include with a script block as shown (in order to combine HTML and JS in one file):
<script src="app.js"></script>
<script>
</script>
6. Paste the HTML into a text editor and paste the Javascript between the <script> </script> markers before saving the file as an HTML file. Click on the file to load it in a PC web browser and it should look similar to the screenshot below. Note that there can be significant variation in the UI generated each time the query is submitted (even using the same GPT) so your own generated app will have a different UI.

7. After confirming that the basic functionality of the app is working without any modifications it is now ready for the addition of RFID support. In order to simplify this process, I have extracted the Enterprise Browser RFID support functions into a separate JavaScript file (zebra_eb_rfid_supportv1.js) which is available via the link below (also attached to this blog).
Automatic Modification
a)Open a command prompt in the same folder as the generated HTML file
b) Unzip the command line utilities posted here in the current folder
https://drive.google.com/file/d/1KKFmjOCVk0RwW0ZeX4OB0JZWnohpuynb/view?usp=sharing
c) Run the supplied batch file addrfid.bat e.g.
addrfid.bat mycheckoutapp.html
d) this will make all required changes apart from the following 2 edits which have to be done manually
- Delete the section starting with the first
</script>
</body>
</html>
And including all the lines up to
function rfidEnumerate()
- Edit the code in function TagHandler(tagarray) to include the call to process the incoming RFID tags which will be in the variable named tagid e.g.
addItemToReceipt(tagid);
e) optionally change the rfid.transport type to Bluetooth if not using an eConnex connection to the RFD
Manual Modification
Load zebra_eb_rfid_supportv1.js into a text editor and follow the guide at the top of the file which details the modifications required which are summarised as follows:
1) add DIV for the RFID connection status – this is required in order to show the RFD Connected/Disconnected status to the user:
<div id="rfidstatus"> </div>
2) add RFID initialisation call when form loads – this will setup the intent listeners for status and tag events and also connect to the RFD
<body onload=startIntentListener() >
3) ensure that the EB includes below are present under the <head> section (elements.js and ebapi-modules.js). These are required in order to use the EB API’s within the app.
<script type="text/javascript" charset="utf-8" src="elements.js"></script>
<script type="text/javascript" charset="utf-8" src="ebapi-modules.js"></script>
4) Copy all the JavaScript functions from the module and paste them into the <script> area of the target app. This will allow the use of the RFID functions within the current app.
5) Check the rfid.transport device type matches the RFD connection type (bluetooth or usb). If the transport does not match the RFD then the connection will not complete successfully.
6) Modify the tag event handler (TagHandler) so that the incoming tags are processed in the target app. Each AI-generated app will have a different way of processing the tagid’s so the tag event handler will always require changes in order to pass the current tagid to the processing function in the app.
In addition to the above, it is a good idea to add a new function to clear the current contents of the text input field each time a barcode/tagid is processed and to ensure that the input field has focus e.g.
function init()
{
document.getElementById('numberInput').value="";
document.getElementById('numberInput').focus();
}
Testing
1.The original and/or RFID-enabled app can be tested with barcodes created to match the tagid’s which have been auto-generated by ChatGPT. One easy way to do this is to extract the tagid’s from the JSON data structure and use them as input to a bulk barcode generator such as this one: Bulk QRcode generator: https://qrexplore.com/generate/
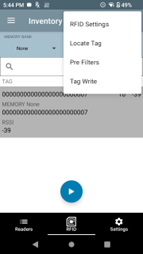
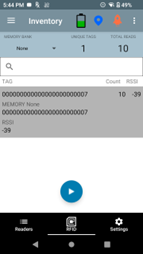
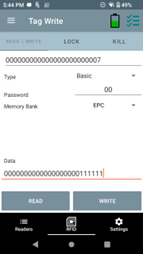
2. The EPC RFID labels to match the generated tagid’s can also be created by writing the tagid in an existing RFID tag using 123RFID Mobile as per the example screenshots below:

3. Alternatively the RFID labels can be encoded and printed using a Zebra RFID printer in conjunction with ZebraDesigner Pro3: https://supportcommunity.zebra.com/s/article/000019953?language=en_US

Ian Hatton
3 Replies
where can we find the elements.js and ebapi-modules.js? thanks, and can you provide a screenshot also for every step so that it will more clearer to us developers? specially in step 7?
The EB include files elements.js and ebapi-modules.js will be located in the folder /sdcard/Android/data/com.zebra.mdna.enterprisebrowser by default. This folder is sandboxed but can be accessed via enabling USB File Transfer from USB Preferences .
Take a look at the demo video I posted here ( https://drive.google.com/file/d/1IXPs_lGyovEqjWCzxNI_2QNxAuFE8qpl/view?… ) which should help to show the manual steps required to add the RFID API calls.
This GenAI guide for Zebra RFID reader web apps is exciting! For developers who want to optimize productivity and prototype apps, it's revolutionary. Using ChatGPT reduces time and allows for innovative RFID integration in everyday applications. Excited to see what unique solutions result!
(https://1games.io/escape-road)